 PickySprout
Building a Cozy Patio Container Garden
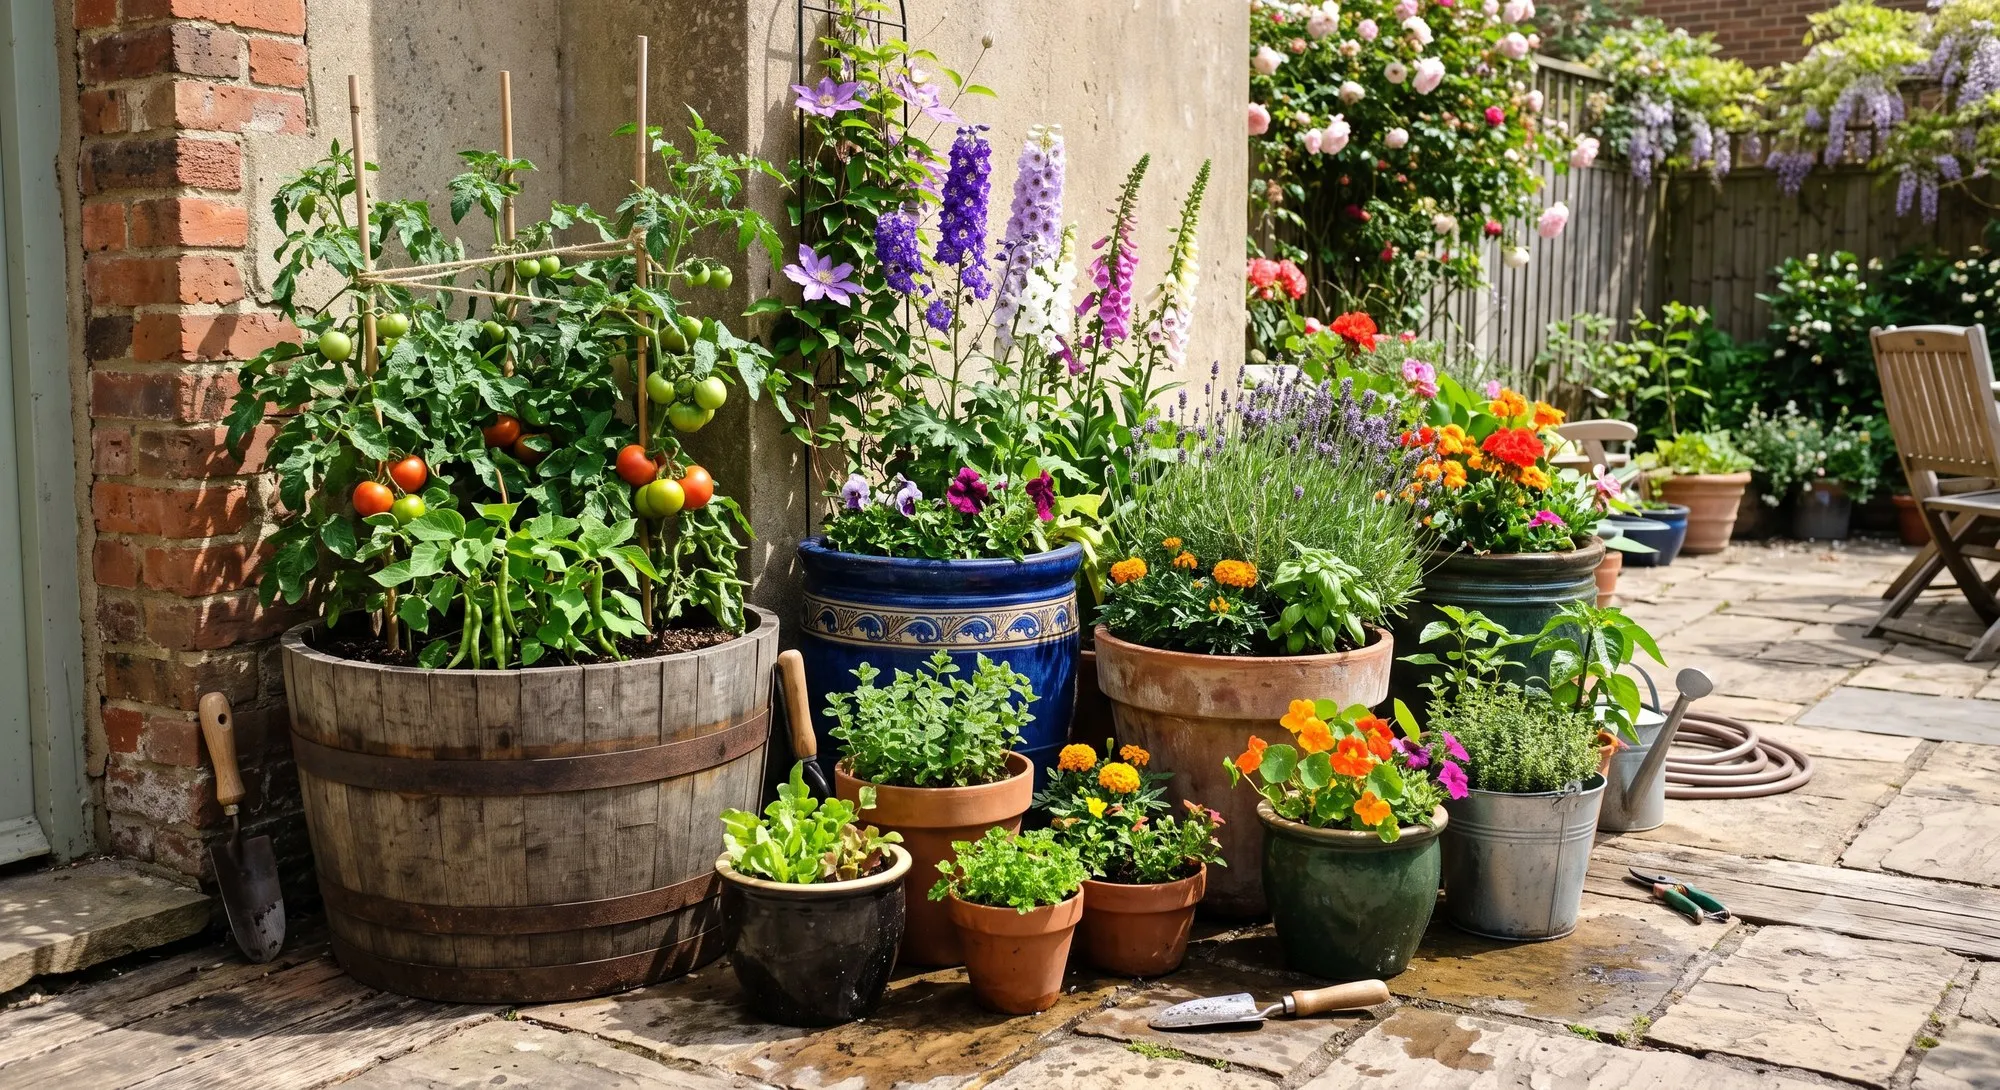
A patio usually gives you more floor space than a balcony, but less soil depth than a yard — no bed to dig into, just whatever you bring in containers. The trick is thinking in terms of container clusters rather than a single row of pots lined up against the wall, which is the default most people fall into and the layout that ages worst once plants fill in.
Planning the layout before you buy a single pot
Walk your patio at three different times of day — morning, midday, and early evening — and note where the sun actually falls, not where you assume it does. Patios are notorious for partial shade from the house itself, a neighboring fence, or an overhang, and the sunny corner in the afternoon is often not the sunny corner in the morning. Sketch a rough map before buying anything; it’s a lot cheaper to fix a plan on paper than to move three filled 15-gallon planters after the fact.
Once you know where the light is:
- Group containers by watering needs so you’re not over- or under-watering neighbors — a thirsty tomato next to a drought-tolerant rosemary means one of them is always wrong
- Leave real walking room between clusters; a patio that looks great with empty pots gets cramped fast once everything leafs out, and a garden you can’t comfortably move through is one you’ll maintain less
- Put taller plants toward the back or against a wall so they don’t shade smaller plants in front of them as the season progresses
- Leave one cluster near the door for whatever you harvest most — herbs, salad greens — so a quick trip outside for dinner prep doesn’t mean crossing the whole patio
Building the cluster, not just placing pots
A cluster works best with three to five containers of varied height, grouped close enough that they read as one arrangement rather than scattered pots. Use a tall anchor plant or trellis at the back, mid-height plants in the middle, and something that spills over the edge — trailing herbs, strawberries, nasturtiums — at the front. This isn’t just aesthetic: taller plants at the back also block wind for the shorter ones in front, which matters more on an exposed patio than most people expect.
Keeping growth even
Rotate your containers a quarter turn every couple of weeks if one side of the patio gets more sun than the other — it keeps growth even instead of lopsided, especially for anything trained upright on a stake, which will otherwise lean hard toward the light source and eventually need re-staking. Set a recurring reminder for this; it’s the maintenance step we see skipped most often because nothing looks urgently wrong until a plant is already leaning 30 degrees.
Picking container material for a cluster
Terracotta looks the part but dries out fastest of the common materials — fine for drought-tolerant plants in a cluster’s back row, a liability for thirsty vegetables up front that you’re already watering daily in summer heat. Glazed ceramic holds moisture longer and comes in enough finishes to anchor a cluster visually, but it’s heavy and, unlike plain terracotta, can crack if water freezes inside it over winter in colder climates. Fabric grow bags are the practical workhorse for a productive cluster: cheap, they air-prune roots (preventing the circling, tangled root mass a rigid pot eventually produces), and they fold flat for off-season storage — the tradeoff is they dry out even faster than terracotta and look less finished, which is why mixing one or two decorative ceramic pots with several fabric bags for the actual vegetables often works better than an all-fabric or all-ceramic cluster.
Maintaining a cluster through the season
A container cluster needs more hands-on upkeep as plants fill in than it did on planting day, since more foliage means more competition for light and airflow within the group. Thin overlapping leaves between neighboring pots every few weeks so each plant still gets direct light rather than borrowed shade from its neighbor, and check the containers in the center of a tight cluster specifically — they dry out slower than the outer ring since they’re shaded from wind and get less direct sun, which means the same watering schedule for the whole cluster can overwater the middle while the edges stay thirsty.
Building the cluster in phases
You don’t need to fill every container on day one. Start with two or three anchor plants in your best containers, live with the arrangement for a couple of weeks, and add smaller pots into the gaps once you’ve confirmed the light and traffic patterns you sketched actually hold up in practice. This phased approach costs a little more in total trips to the garden center, but it avoids the more expensive mistake of filling every container up front around a layout guess that turns out wrong once plants are established and harder to move.
Making room for sitting, not just growing
A patio container garden that fills every square foot with pots eventually stops being a place you actually spend time, which defeats part of the point of gardening somewhere you also relax. Reserve a dedicated seating footprint before laying out containers — even a small two-chair spot — and build the cluster around it rather than shrinking it later once pots are already in place. A patio that includes somewhere to sit near the plants also gets checked on more often out of simple proximity, which means problems get noticed sooner than on a patio you only pass through.