 PickySprout
How to Start Seeds Indoors on a Windowsill
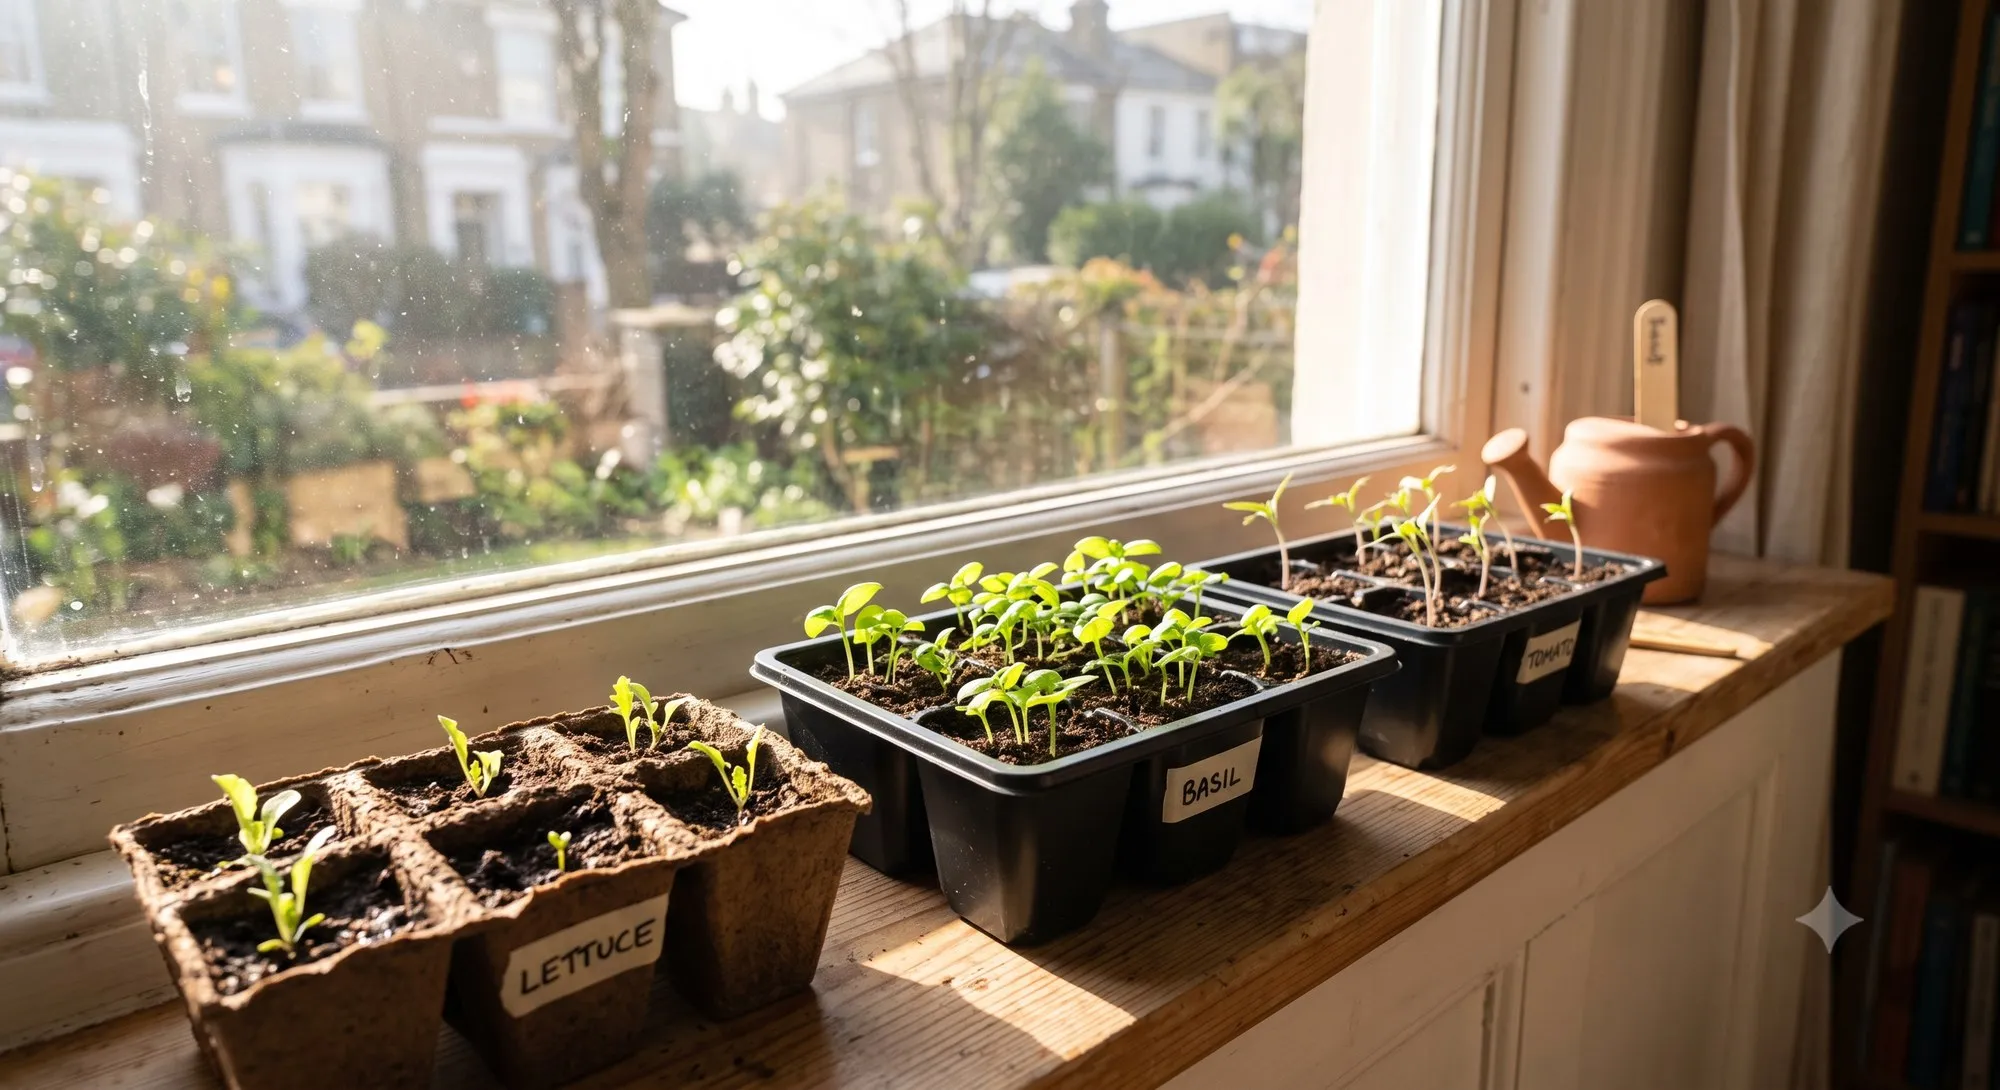
Starting seeds indoors gets a plant several weeks’ head start before outdoor conditions are ready, and a windowsill is enough to do it — no grow tent or dedicated shelving required, as long as you understand where a windowsill setup falls short and plan around it.
What you’ll need
- Small seed trays or repurposed containers (yogurt cups, egg cartons) with drainage holes punched in the bottom
- A seed-starting mix, not regular potting soil — it’s finer-textured and sterile, which matters for tiny, disease-prone seedlings in a way it doesn’t for established plants
- A humidity dome or a loosely draped sheet of plastic wrap to keep moisture in during germination
- Your sunniest windowsill, ideally south- or west-facing
Sowing and germination
Follow the seed packet’s depth guidance closely — over-planting depth is one of the most common reasons seeds fail to emerge at all, since a seed buried too deep runs out of stored energy before reaching the surface. Keep the mix consistently moist (not soggy) during germination, and keep the humidity dome on until you see the first sprouts, then remove it — leaving it on too long after germination invites damping-off, a fungal disease that kills seedlings at the soil line and thrives in trapped, stagnant humidity.
The windowsill’s real limitation: light
This is where windowsill seed starting most often goes wrong. A window provides directional light — strong from one side, weak from the other — and seedlings respond by stretching toward the glass, producing thin, pale, leggy stems instead of the short, sturdy growth you want. Even a south-facing window in winter often doesn’t deliver enough total light hours for compact growth. Two adjustments make a real difference:
- Rotate trays a quarter turn daily. Seedlings correct their lean each time, which keeps stems straighter than leaving them facing one direction throughout germination
- Consider a supplemental grow light if stretching happens despite rotation — for late-winter starts especially, natural light often isn’t enough on its own, and a cheap clip-on light positioned close to the trays fixes leggy growth faster than any windowsill adjustment can
Hardening off before the windowsill-to-outdoors move
Seedlings grown entirely indoors haven’t experienced real wind, direct outdoor sun intensity, or temperature swings, and moving them straight outside stresses or kills them. Harden off over a week to ten days: start with an hour or two in a sheltered, shaded outdoor spot, and gradually increase both duration and sun exposure each day. Skipping this step is one of the most common ways a batch of otherwise-healthy windowsill seedlings gets lost right at the finish line, after weeks of successful indoor growth.
Timing it against your last frost date
Check your local last frost date and work backward using the seed packet’s “weeks before last frost” guidance — starting too early leaves you with overgrown, root-bound seedlings waiting weeks past when they should be transplanted, which stresses them nearly as much as starting too late.
Thinning crowded seedlings
Most seed packets recommend sowing two to three seeds per cell as insurance against poor germination, which means you’ll often end up with more seedlings than a small cell or pot can properly support. Once true leaves appear (the second set, which look like the actual plant rather than the rounded seed leaves that emerge first), snip the weaker seedlings at the soil line with small scissors rather than pulling them — pulling disturbs the roots of the seedling you’re keeping, which shares the same small volume of soil and can set back the survivor’s growth by days.
Potting up before the outdoor move
A seedling that’s outgrown its starting cell but isn’t ready for outdoor conditions yet needs a bigger indoor pot as an intermediate step, not a rush outside before it’s hardened off. Signs it’s time: roots visible through the cell’s drainage holes, or growth that’s clearly stalled despite otherwise healthy-looking leaves. Move up one container size at a time — jumping straight from a small seed cell to a large pot surrounds the small root ball with more soil than it can use, which tends to stay wet longer than the roots want and invites the same damping-off risk you managed during germination.
Failure modes beyond legginess
Damping-off is the other major windowsill seed-starting failure, and it looks different from a light problem: a seedling that was fine yesterday suddenly collapses at the soil line, the stem pinched and dark right at ground level, while the leaves above stay green for a day or two before wilting. It’s caused by fungal pathogens that thrive in cool, wet, poorly-ventilated soil — using sterile seed-starting mix, avoiding overwatering, and removing the humidity dome promptly after germination (rather than “just in case” a few extra days) are the real prevention, since there’s no reliable cure once a seedling is affected. Fuzzy white or grey mold on the soil surface without seedling collapse is usually just surface mold from excess moisture and stagnant air — increasing airflow (a small fan on low, run for a few hours a day) and letting the surface dry slightly between waterings clears it without needing to restart.